
This guide details how to create an automated planogram compliance detector using the Neurolabs platform.
You can also check out our video guide below.
A quick demo of how the Neurolabs platform helps automate planogram compliance.
Firstly, log in to Neurolabs at app.neurolabs.ai
Once you’re logged in, click on “ReShelf” on the left hand side of the screen. ReShelf is our computer vision solution to automate planogram compliance and on-shelf availability management in supermarkets.
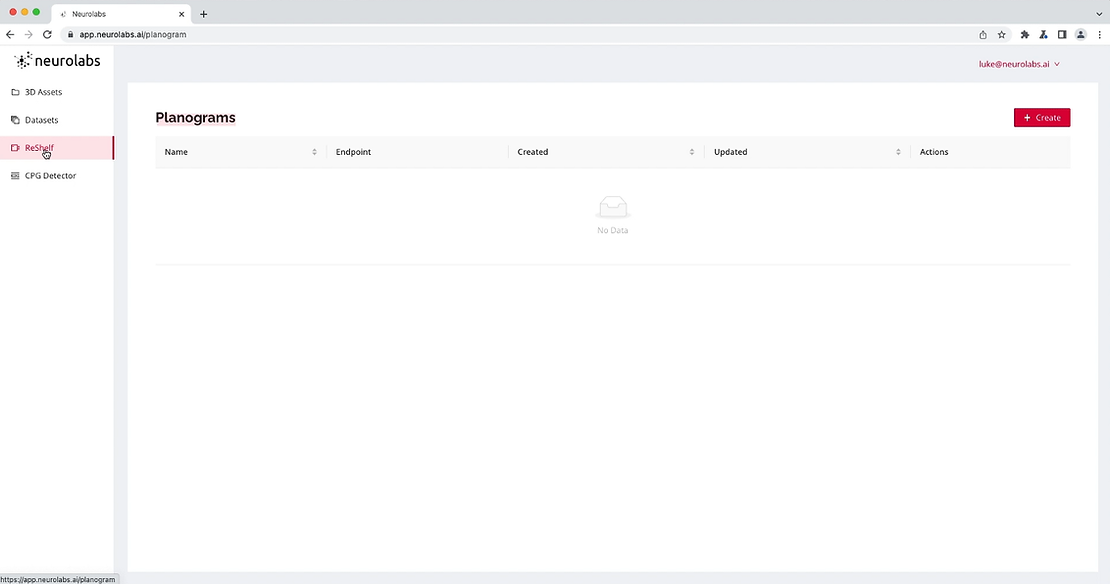
On the ReShelf page, click the “Create” button.

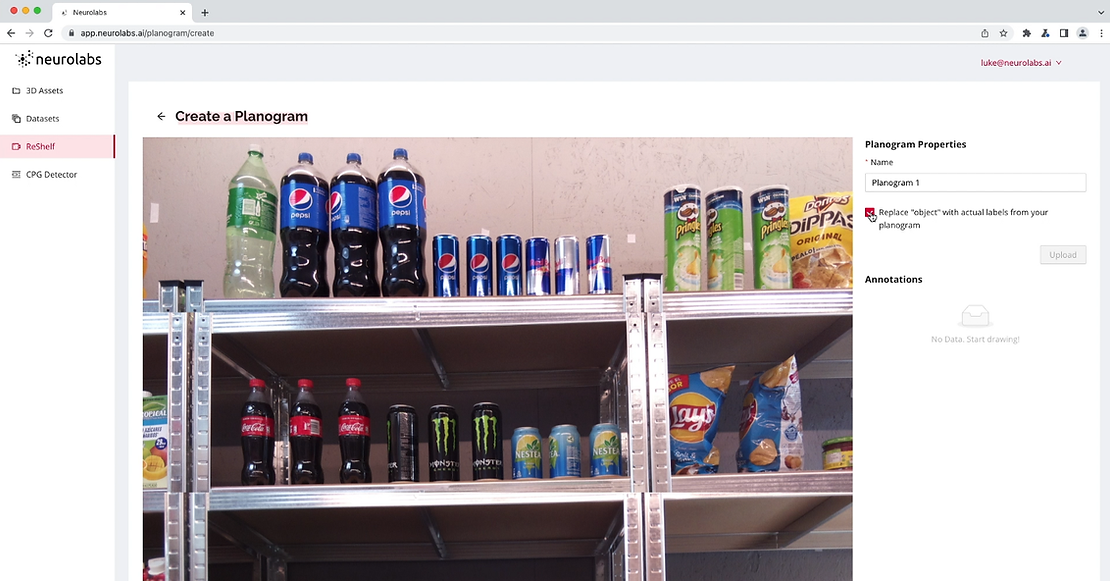
From here, enter a name for your Planogram in the “Name” field.
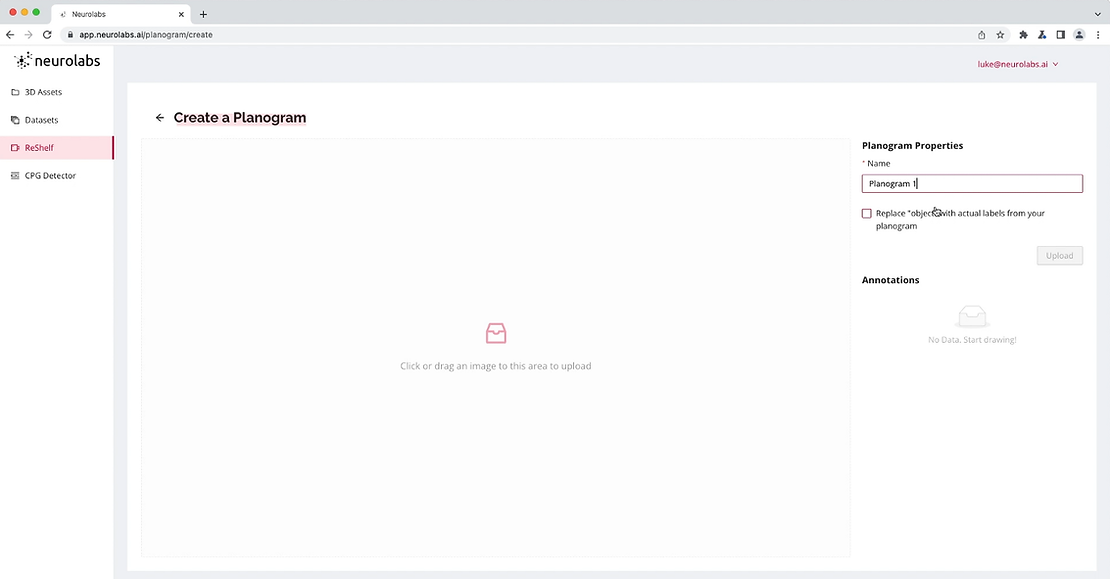
Then, simply upload an image of the products on the display for which you want to create a Planogram for.
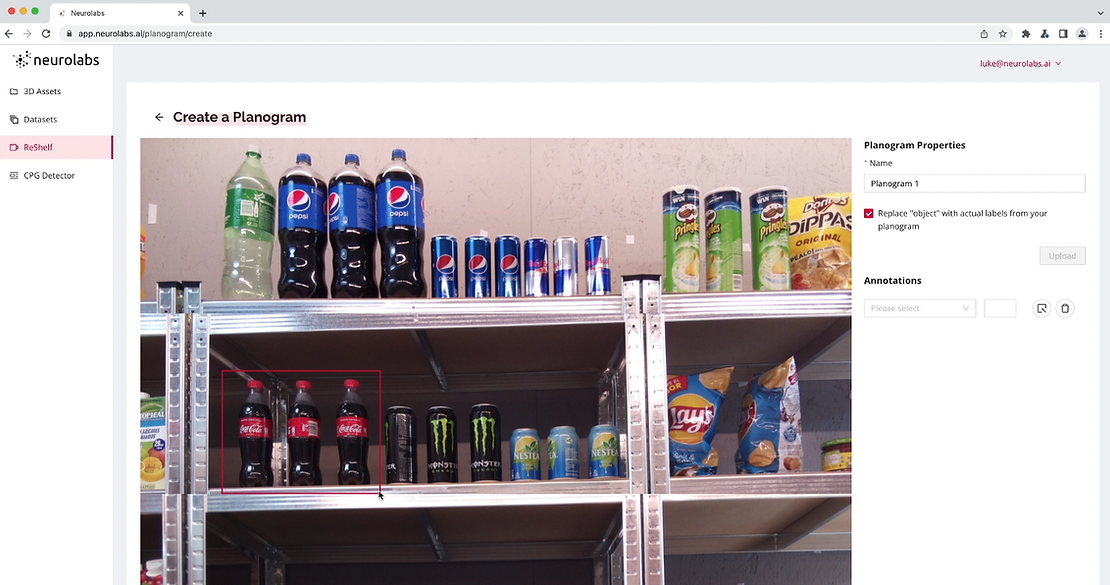
You can now label and annotate each grouping of products to your liking.
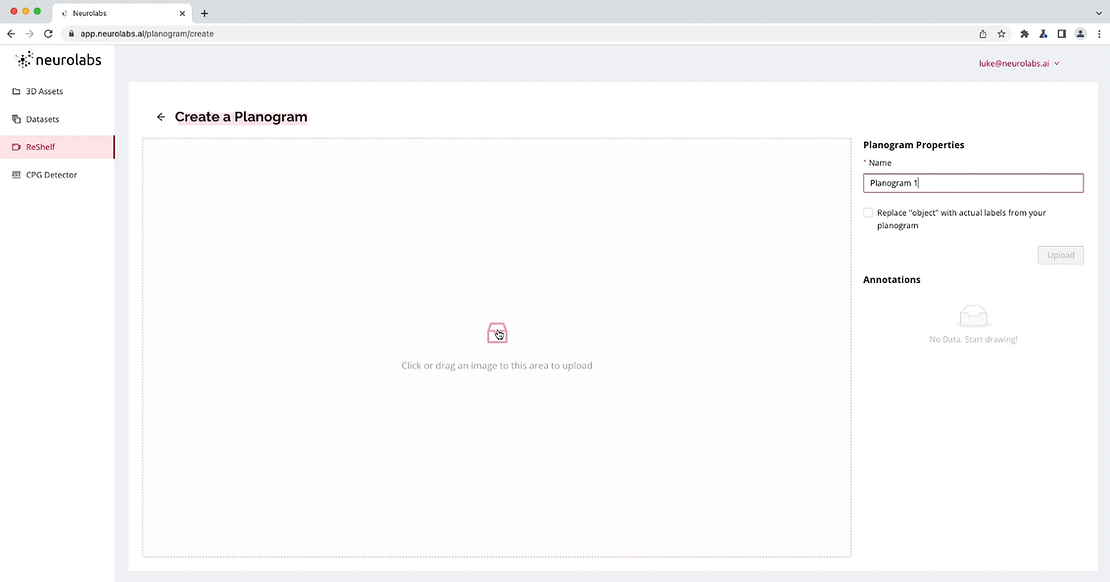
Firstly, select the option to “Replace the generic “object” label with specific labels of the products in your planogram”.
Then, click and drag bounding boxes around each different product group like so.
Now, enter the specific details for each product grouping.
Be sure to select a product from the drop down list to annotate the bounding box correctly.
You should do this for all of the products in the planogram image
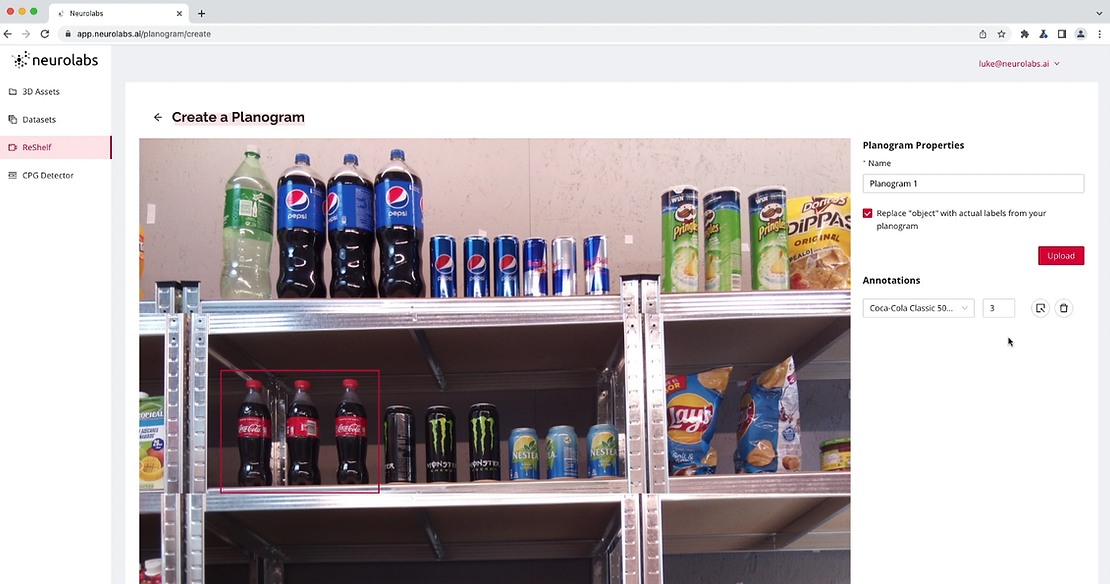
Once you’re happy, click “Upload”.

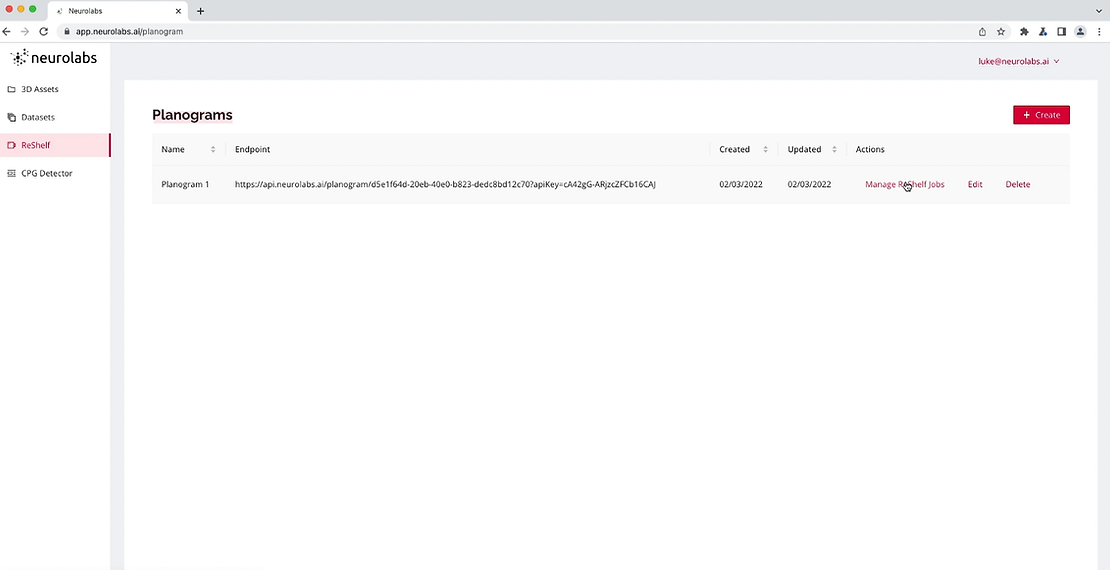
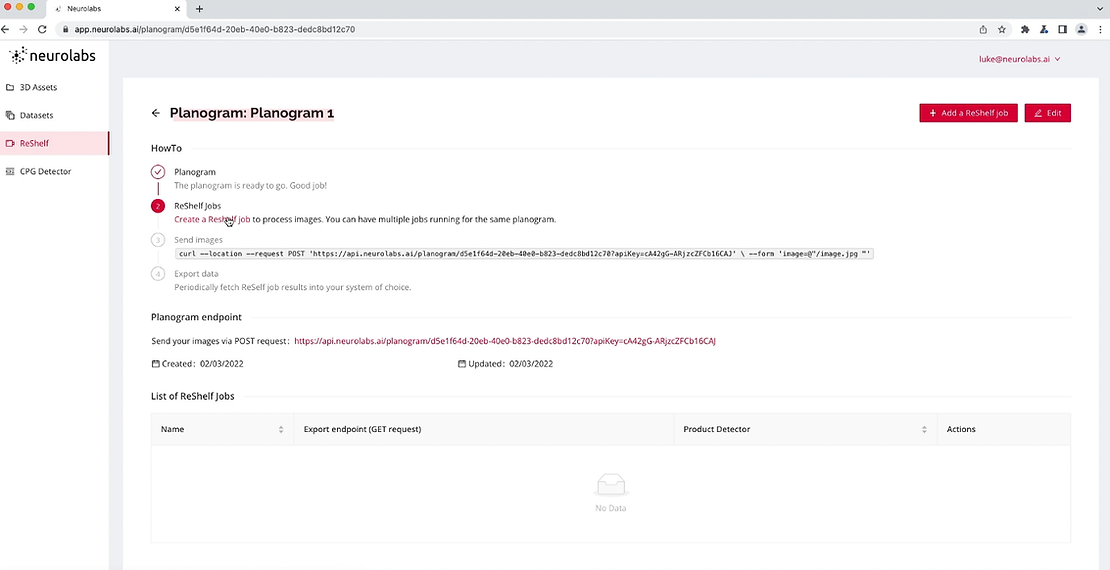
Next, you want to create a ReShelf job to process any of the images that will be fed into to the Planogram compliance detector.
To do this we click the “Manage ReShelf Jobs” option on the planogram we just created.
From here click “Create a ReShelf job”.
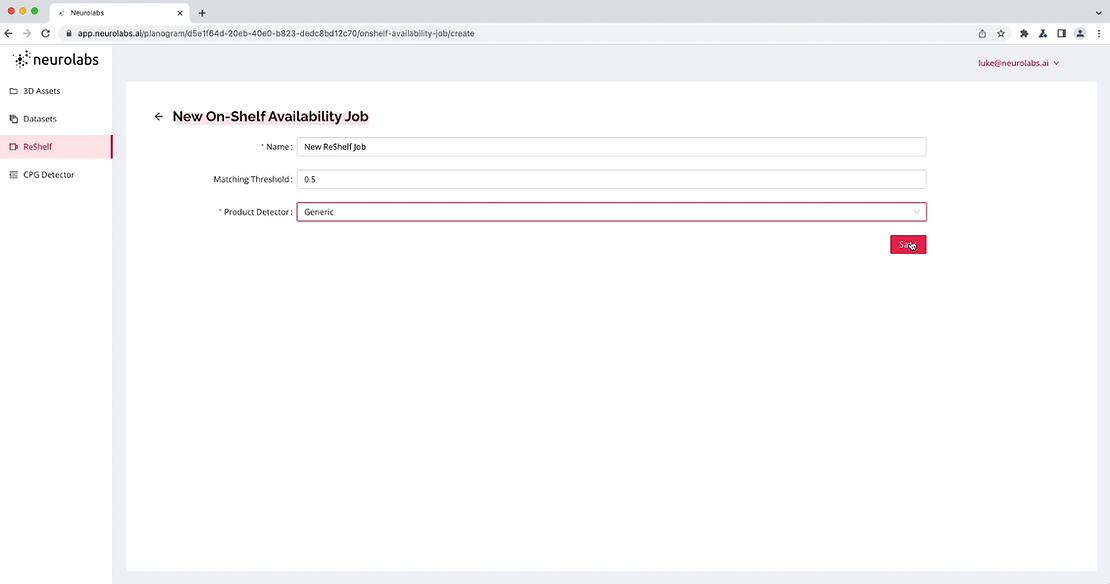
Choose a “Name” for your ReShelf job and select the type of “Product Detector” that will carry out detections for this planogram.
For this example we will use a “Generic” object detector but this will vary depending on your specific use case.
You can leave the “Matching Threshold” as its default value for now.

Press “Save” to successfully create the ReShelf job.
Under “Send Images”, you now have an endpoint that you can use to query and send images to.
As you can see below we have the POST request, the endpoint, and the API key.
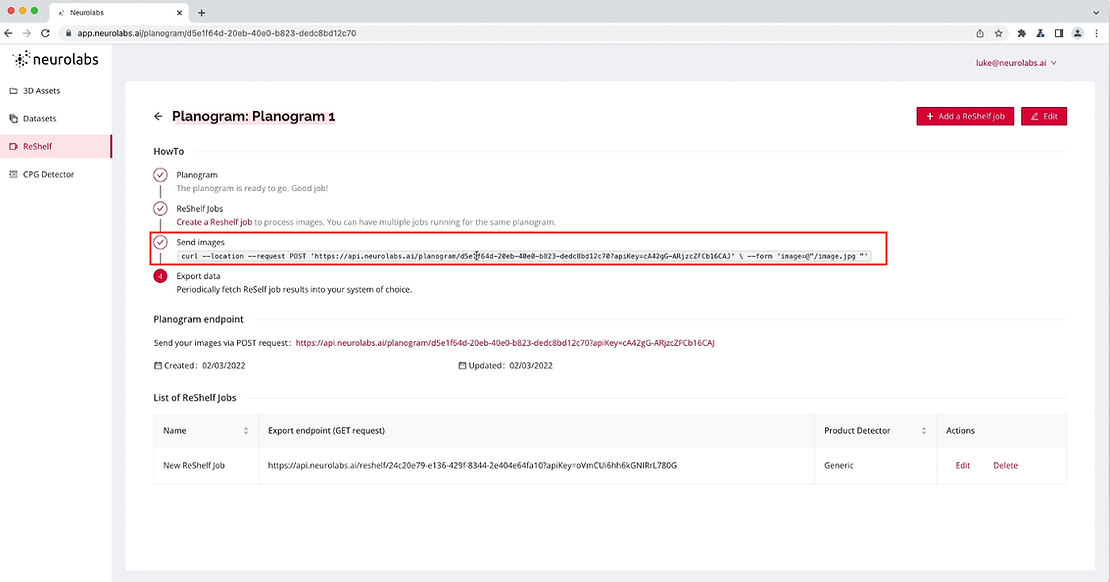
We can now send any shelf images to this endpoint. The purpose of sending images here is to have our planogram compliance detector ensure that the products on the shelf in the image comply with our ideal planogram which we created earlier.
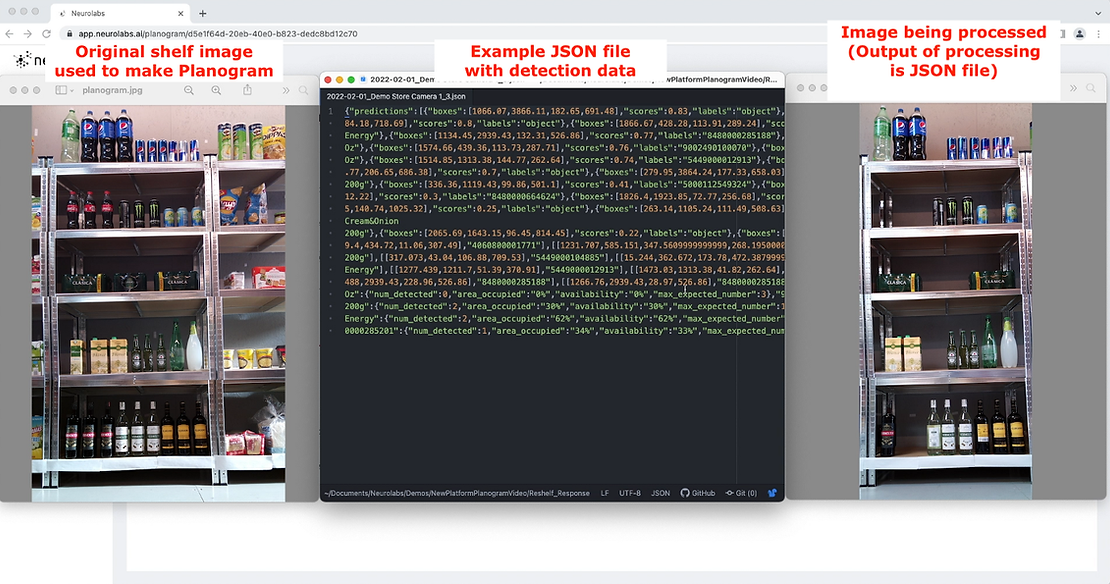
The response to queries using this endpoint will be returned in the form of a JSON file which includes predictions in the form of the bounding boxes and product detection scores.
It will also include information on whether or not the image queried matches the planogram that we originally created.
This information will also reveal whether or not there is an out-of-stock.
Thanks for checking out our guide. Be sure to check out our post on How to Enhance your Brand with Automated Planogram Compliance for more tips and useful information!
Reach out to the Neurolabs team if you have any questions and we’ll be happy to help! 🙂
Retailers worldwide lose a mind-blowing $634 Billion annually due to the cost of poor inventory management with 5% of all sales lost due to Out-Of-Stocks alone.
Neurolabs helps puts an end to Out-Of-Stocks and automates Planogram Compliance using a powerful combination of computer vision and synthetic data, improving customer experience, enhancing brands, and increasing revenue. 🤖
.jpg)

